Several days ago some of my baking friends were blown away when I posted a photo of rolls that I had made using a piece of bread as the leavening agent. I had started reading sewing and hand craft books when I was six years old and had ordered a sewing book from The Scholastic Book Club. My reading of cookbooks had begun at about the same time with my mother's collection of cookbooks that sat on a low bookshelf in our kitchen.
The availability of cooking and sewing books from late in the 19th century and early in the 20th century for free on Google Books is one of the things that gives me great joy. One of them l;ate 19th century cookbooks I had found had a long intro to their bread section that discussed various kinds of yeast. Like many things that I read, it took a few years for the information in that book to actually make sense to me.
One of the yeast sources in that book was stale bread. The rolls pictured above were made using this method. The rolls are delicious. To be honest though, I didn't give the dough enough time to rise during any of the stages of the bread baking. This means that these rolls are extra chewy. The rolls would have been improved with a longer time to just sit and hang out at each of the stages. But since you are just looking at the process and not eating these actual rolls...I suppose that this is OK.
This is the process...
Put your slice of bread- (this was homemade) in about 2-3 cups of water. I just used cold water out of the tap, I probably ought to have warmed it to wrist temp. It also makes sense to pre-crumble your bread before you add it to the water.
Break up the bread, and add 1 Tbs of brown sugar and one of flour to feed the yeast. Let this mixture sit for at least 30 minutes. You see some bubbles starting to form already. That is a good thing.
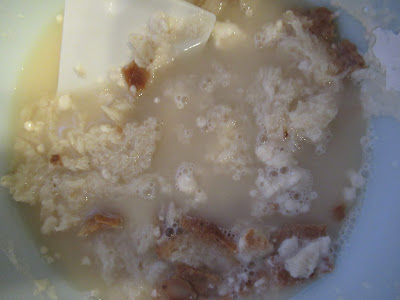
When I came back my mixture looked like this. I probably should have let it do it's thing for a while longer and allowed the mixture to become a bit more bubbly.
I added a tablespoon of salt (you can still see the salt grains to the left of my spatula blade and some oil. To be honest, I didn't measure the oil but let's assume it was about 1/3 of a cup. One of the nice things about bread baking is that it doesn't need a whole lot of precision unless you are baking for a commercial bakery.
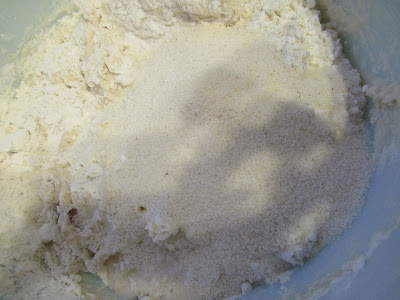
I added flour a cup at a time. I also wanted to add a different texture, so I added some semolina. I usually add something to my bread flours, some cooked grain or corn meal or I grind up some grain that I have in my pantry in my coffee grinder. It's to vary the taste and the texture of the bread.
Keep adding flour and mixing it into the dough. Eventually it will be difficult to work with the spatula so you will switch to mixing with your hand.
I know most cookbooks suggest that you turn the bread out of the bowl to knead it. I knead in the bowl because I don't have a staff cleaning up after me. By kneading in the bowl, I contain the mess.
I can hear some of you asking exactly how much flour should you use? The reality is that I can't give you an honest answer. I don't know how your flour was stored before you bought it. I also don't know how much moisture your flour has absorbed living on your pantry shelf. Nor do I know how humid it is in your kitchen as you bake. You keep adding flour and kneading it into the dough until you have a dough that is smooth and feels like a coherent thing and not a hairy mess of a dough.
Kneading the dough also helps to develop the gluten in the flour and gives you a loaf with a good texture. I stopped at this point, covered my dough with a towel and let it to rise.
Two hours late I came back to this. We were going to be eating in two hours. I probably ought to have let the dough sit for another hour.
I formed the dough into rolls.
They rose for another hour or so under a towel.
I put a pan of water on the lowest rack of the oven to add steam. The steam just makes the bread better. it's just a bit of baking magic. I turned up my oven to 420. After the oven preheated, I put the rolls in the oven and turned down the heat to 385.
Once they were baked, they looked like this.


Comments
Post a Comment
I love hearing from my readers. I moderate comments to weed out bots.It may take a little while for your comment to appear.